← All products
Retail billing & inventory for Windows

BillMatePOS — fast billing for busy counters

Scan, bill and print in seconds. BillMatePOS runs your billing counters, stock and day-end cash on your shop's own PCs — from one counter up to three, all sharing the same stock.

  • ₹2,999per counter / year
  • 30 daysfree trial
  • 1–3counters supported
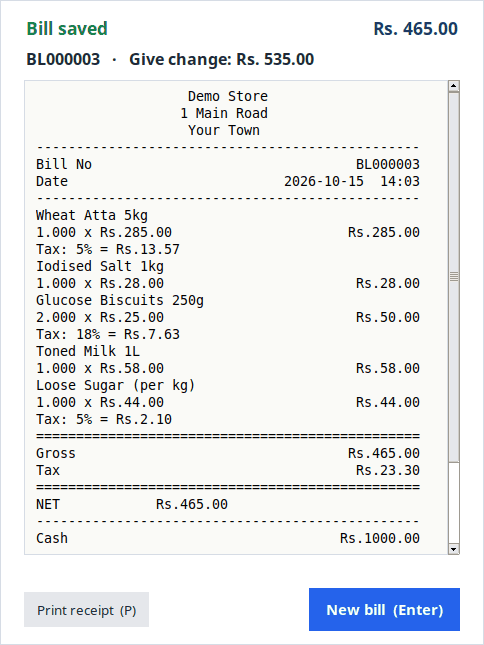
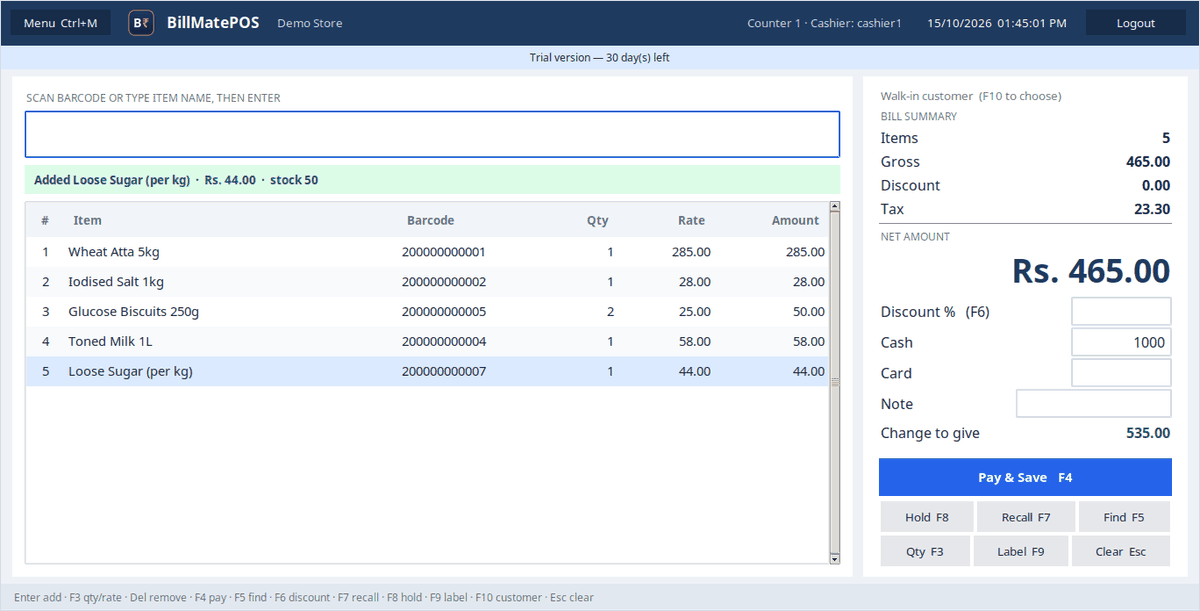
BillMatePOS billing screen with scanned items, bill summary, cash and change to give

Made for the way a shop counter works

Short queues, simple screens and stock you can trust — for small and medium retail shops.

  • Fast billingScan and press Enter. One key to pay, hold, recall or find an item.
  • Simple to learnPlain words, large figures and a built-in Help Center for new staff.
  • Barcode-friendlyAny USB barcode scanner; print your own barcode price labels.
  • 1 to 3 countersAdd counters as the shop grows — one shared database on the Main PC.
  • Shared stockEvery counter sees the same stock; the last piece can only be sold once.
  • Your data stays in the shopA PostgreSQL database on your Main PC — no cloud account needed.

Everything the counter and the back office need

From the first scan of the morning to the cash count at closing time.

Billing at the counter

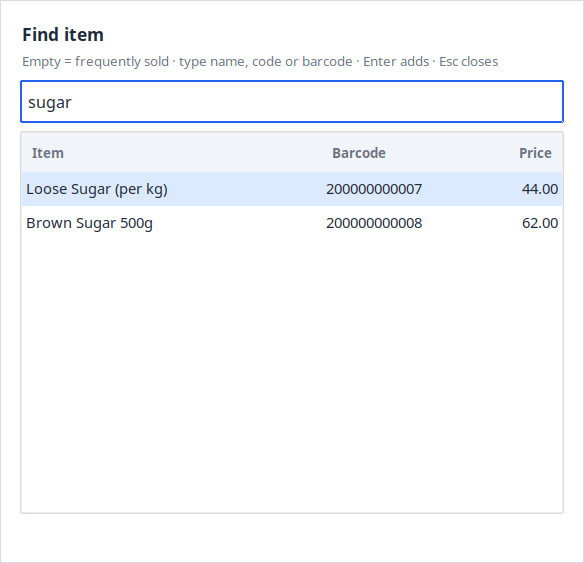
  • Barcode billing, or search by item name or code
  • Many items in one bill, including loose items sold by weight
  • Hold a bill for a waiting customer, recall it later
  • Bill discount; cash, card or split payment with change to give
  • 80 mm receipts with your shop name, GSTIN and item-wise GST
  • Customer on the bill (optional)

Products & stock

  • Items with groups, barcodes, prices and GST rate
  • Stock inward, outward, wastage and stock audit
  • Stock checked on every bill — never sold below zero
  • Barcode price labels for unlabelled items
  • Inventory view with the stock of every barcode
  • Suppliers and customers

Returns, cash & day-end

  • Return some items of a bill, or cancel the whole bill
  • Refunds and cancellations recorded with remarks
  • Each counter opens its day with its own opening cash
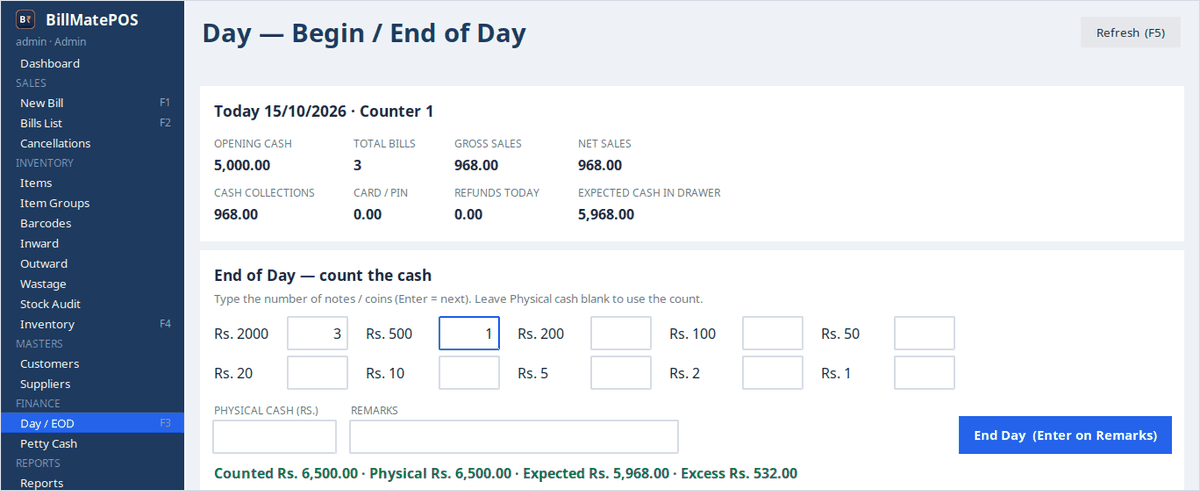
  • End of Day per counter: count notes and coins, see shortage or excess
  • Petty cash payments and receipts

Reports, staff & safety

  • Bill summary, bill detail, GST, End of Day, inventory and stock reports — print or export to Excel (CSV)
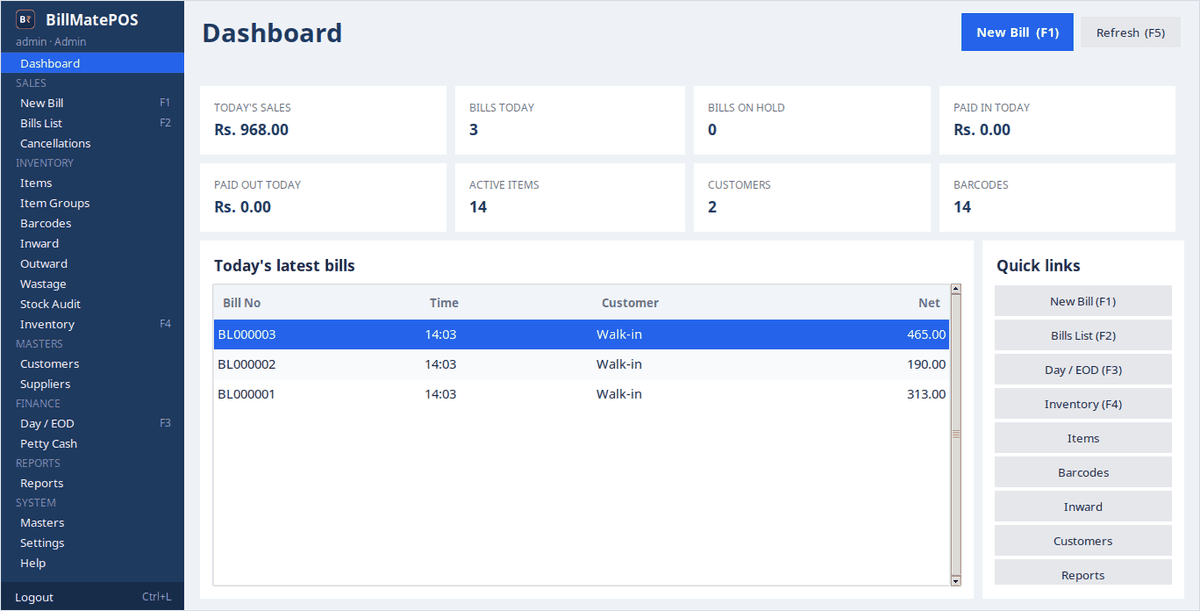
  • Dashboard with today's sales and bills
  • Administrator and cashier logins
  • Backup and restore; automatic backup at End of Day
  • Optional companion app: use a smartphone as a barcode scanner

One shop, up to three counters

Start with one counter. When the queue grows, add a second and a third. The Main PC keeps the shop's database; the other counters connect to it over the shop's own network.

  • Shared items, prices, customers and stock on every counter
  • Bill numbers never repeat, even when counters bill at the same moment
  • Every bill, refund and day-end shows its counter
  • Each counter counts and closes its own cash drawer
  • Each counter has its own licence — activating one never affects another

The Main PC is Counter 1, and each billing counter requires its own licence — ₹2,999 per counter / year.

Fits the shops on your street

Supermarkets & grocery

Fast scanning for long queues, loose items like rice, vegetables and fruit sold by weight, GST on every bill, and up to three counters on one stock.

Textile & garments

Give every size its own barcode and print price labels. Bill discounts, card payments and returns of single items are part of normal billing.

Mobile & electronics

Barcode billing for accessories and gadgets, stock per product, card and split payments, and a clear record of every return.

General retail

Stationery, household goods, gifts and more — one simple screen for billing, stock and the day's cash.

A day at the counter

  1. Productsitems, barcodes, GST
  2. Stockopening stock in
  3. Barcode billingscan or search
  4. Paymentcash, card or split
  5. Receiptprinted for the customer
  6. Stock updateinstantly, all counters
  7. End of Daycount each drawer
  8. Backupautomatic at day-end

A clear screen for every job

Large figures, plain words and the shortcut key printed on every button.

Bill without touching the mouse

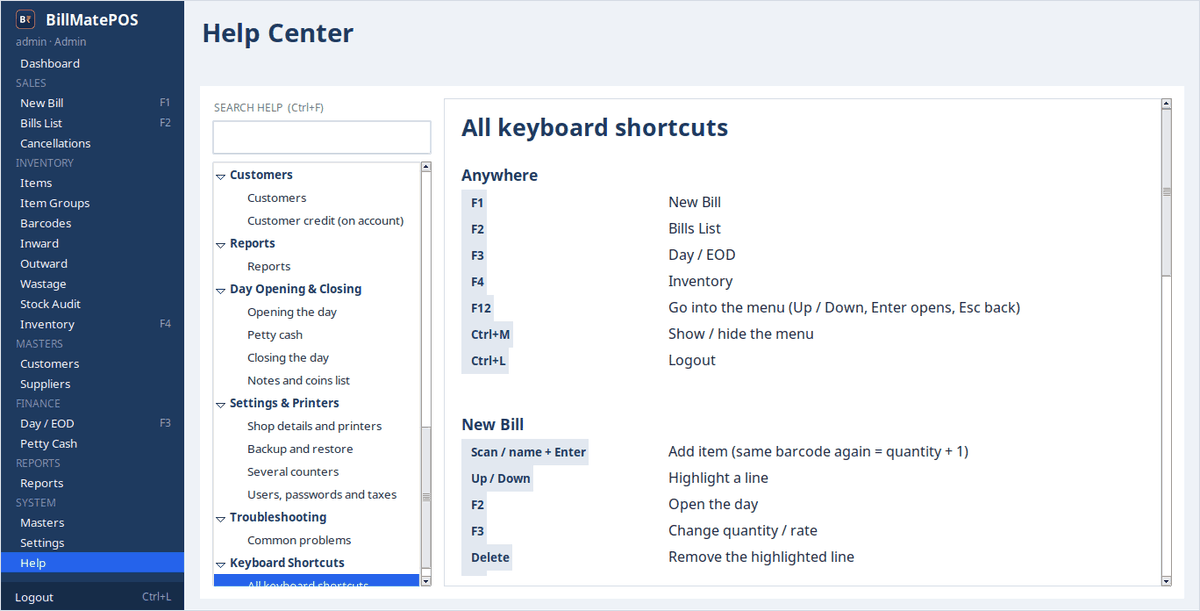
A barcode scanner and a keyboard are all a cashier needs. The key for each action is printed on its button and listed at the bottom of the billing screen, so new staff pick it up quickly.

EnterAdd the scanned or typed item
F3Change quantity or rate
F4Pay and save the bill
F5Find an item by name
F6Discount
F8Hold the bill
F7Recall a held bill
F9Print a barcode label
F10Choose the customer
EscClear the bill

Your shop's data, kept safe

Built so that a busy day, a mistake or a new version never costs you your records.

PostgreSQL database

A proven database engine on your Main PC. Every bill is saved completely or not at all.

Protected shared stock

Counters save one after another, so two counters can never sell the same last piece.

Backup & restore

A backup at every End of Day and with one click. A restore takes a safety backup first.

Safe updates

New versions update the database automatically — after a backup, and all-or-nothing.

Counter-aware records

Bills, refunds and day-ends record their counter, so every drawer can be checked.

Licence protection

Each licence is tied to its counter's PC; a copied or edited licence is not accepted.

Simple pricing — pay per billing counter

Start free for 30 days. Then one yearly licence for each counter that makes bills.

Per counter

₹2,999 per counter / year

The Main PC is Counter 1, and each billing counter requires its own licence.

Yearly price by number of counters
Your shopPrice per year
1 counter₹2,999 / year
2 counters₹5,998 / year
3 counters₹8,997 / year

Adding a counter later? ₹2,999 for a 12-month licence.

30-day free trial

For the whole shop, shared by all counters. Every feature works and no payment is needed to start. The 30 days start the first time BillMatePOS is used; counters added later share the same days.

Renew once a year

BillMatePOS shows a reminder 30 days before a licence ends. A renewal reaches the counter automatically when it is online — nothing to reinstall. If a licence ends, that counter can still bill for 14 more days.

Each counter is separate

If one counter's licence ends, the other counters keep billing. Your bills, items and reports are never deleted.

From free trial to licensed counters

  1. Install the free trialDownload and install BillMatePOS on the Main PC, then on Counters 2 and 3.
  2. Use it for 30 daysEvery feature, on all your counters.
  3. Contact SastiLabTell us your shop name and how many counters you want to license.
  4. PaySastiLab sends you the amount and the payment details.
  5. Get your keysYou receive one licence key for each counter.
  6. Activate each counterOn that counter: System → Settings → Activate license (Ctrl+K). Internet is needed once.
  7. Renew yearlyContact SastiLab before the year ends; your keys are extended — no new key, no reinstall.

Download & install BillMatePOS

Free for 30 days on every counter. No cloud subscription and no internet needed for daily billing.

Which installer do I need?

Every shop Main POS Installer Install it on the Main PC first, then on each extra billing counter. One file for all of them.
Optional Mobile Scanner Installer Only if you want to scan barcodes with Android phones instead of (or as well as) a barcode scanner. Install it on the Main PC after BillMatePOS; the phones get the Android app. USB and Bluetooth barcode scanners do not need it.
Available now

Main POS Installer

BillMatePOS and its database (PostgreSQL 11), for the Main PC and every counter.

File
BillMatePOS-Setup.exe
Version
1.0.0 · 11 October 2026
Size
341 MB
Windows
Tested on Windows 7 SP1 (64-bit). Designed for Windows 10 and 11 (64-bit).
Check the file (SHA-256) 877139f5dd61e72e24c78ebc2eb66ec3facf32676fe5c208022a11de5c858e23
Optional

Mobile Scanner Installer

For the Main PC: receives barcode scans from Android phones on the shop Wi-Fi. The phones need the free BillMate Scanner Android app.

File
BillMatePOS-MobileScanner-Setup.exe
Version
1.0.0 · 11 October 2026
Size
6.2 MB
Windows
Same as BillMatePOS. Install BillMatePOS first.
Check the file (SHA-256) fadc8c6bbbd799b17338315b0af4928693e0bb0fc317cd35851a12e2ba785a8b
Available now

Installation & Setup Guide

Step by step with pictures: Main PC, extra counters, first login, trial and licence, daily billing, Petty Cash, End of Day, backup and upgrades, Mobile Scanner, and common problems.

File
PDF · 22 pages · version 1.0.0
Size
0.7 MB

Already using BillMatePOS? Back up before you upgrade

  1. On the Main PC, open System → Settings and press Ctrl+B (Backup now). Copy the backup file it names to a USB drive.
  2. Close BillMatePOS on every counter.
  3. Run the new installer on the Main PC first and log in there once — this updates the shop's database (a backup is taken automatically first). Then install it on the other counters.

Installing a new version keeps all your bills, items, stock, customers and settings. Removing BillMatePOS also keeps the database and backups. Do not delete the PostgreSQL folder or the BillMatePOS folder in Documents.

Installation, step by step

Use an administrator account on Windows. Installing takes about 5 minutes per PC.

Step 1 · Required

Main PC

The computer that stays on all day and keeps the shop's data — usually the owner's billing counter.

  1. Download the Main POS Installer and close other programs.
  2. Right-click the file → Run as administrator → Yes.
  3. Click Next. Setup installs BillMatePOS and its database — keep the PC on until it finishes.
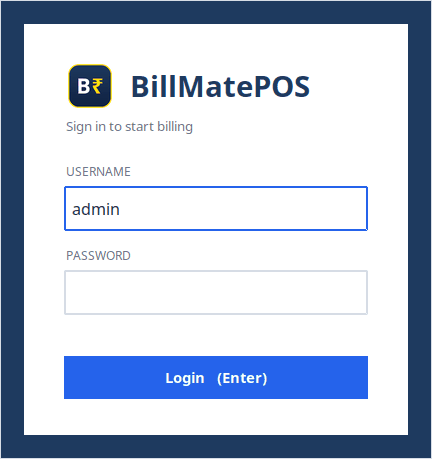
  4. Click Finish. Log in with user admin, password admin123, then choose your own new password and write it down.
  5. In System → Settings, enter your shop name, GSTIN and printers. Your 30-day trial has started.
Step 2 · If you have more counters

Counters 2 and 3

Each extra PC must be on the same shop network (cable or Wi-Fi) as the Main PC.

  1. On the Main PC: System → Settings → Add counter, check the name (for example Counter 2) and save the file it makes onto a USB drive.
  2. Copy the Main POS Installer onto the same USB drive.
  3. On the new counter, run the installer from the USB drive as administrator and answer Yes to “Install this PC as an additional counter”.
  4. Delete BillMatePOS-counter.ini from the USB drive — it contains the database password.
  5. Log in with an existing user name and password. Keep the Main PC switched on while counters bill.
Optional

Mobile Scanner

Only for shops that scan with Android phones. Install BillMatePOS first.

  1. Run the Mobile Scanner Installer as administrator on the Main PC. It starts with Windows and allows phones on the shop network only.
  2. Run it on every other counter that should receive phone scans.
  3. Install the BillMate Scanner Android app on each phone and connect the phone to the shop Wi-Fi.
  4. On the phone, log in with the cashier's BillMatePOS user name. Scans go to the counter where that cashier is logged in.

What you need

  • Windows 64-bit: Windows 7 SP1 (tested), Windows 10 or 11
  • Windows account administrator rights, to install
  • Screen 1366 × 768 or larger
  • Barcode scanner any USB scanner in keyboard mode
  • Receipt printer 80 mm thermal printer with a Windows driver
  • Label printer optional, for barcode price labels
  • More counters one PC per counter on the shop network
  • Internet once per counter, to activate its licence

Windows may ask you to confirm

The installers are not yet digitally signed, so Windows shows a caution before they run. This is expected for files downloaded from this page.

  • Windows 10 / 11 “Windows protected your PC”: click More info → Run anyway.
  • Windows 7 “Unknown publisher” or “Do you want to allow…”: click Yes.
  • Not sure? Compare the file's SHA-256 above, or email us before installing.

Prefer help? Our team can install and set up BillMatePOS at your shop. Contact us.

If something goes wrong

The download does not start, or the file is missing

Refresh the page and try again. If it still fails, email support@sastilab.com and we will send you the installer.

Setup says “BillMatePOS needs 64-bit Windows” or “install Windows 7 Service Pack 1 first”

BillMatePOS needs 64-bit Windows 7 SP1 or newer. On Windows 7, install Service Pack 1 with Windows Update, then run the installer again.

Setup stops with a database message

Each message says what to do, and “Nothing was changed” means no data was lost. Usually: restart the computer and run the installer again as administrator. If it says port 5432 is used by another database program, or the problem returns, email us the file C:\BillMatePOS\setup\setup_database.log.

A counter says “Lost connection to the database”

Check that the Main PC is switched on and that both PCs are on the same network. If a new counter cannot connect at all, run C:\BillMatePOS\setup\allow_counters.bat as administrator on the Main PC, then try again.

Licence activation fails

Activation needs internet once on that counter. Type the key exactly as you received it (System → Settings → Ctrl+K). Each key works on one counter's computer. If it still fails, email us the message shown.

Phones cannot connect to the Mobile Scanner

Keep the phone on the shop Wi-Fi (the same network as the Main PC) and the Main PC switched on. If it was just installed, restart the Main PC once. Still not working? Email us the file C:\BillMatePOS-MobileScanner\mobile-scanner.log.

Scan barcodes with an Android phone

The free BillMate Scanner app turns any Android phone into a barcode scanner for your counter. Optional — USB and Bluetooth barcode scanners work without it.

Two parts work together

On each phone BillMate Scanner — Android app Uses the phone's camera to read barcodes and sends each scan to BillMatePOS over the shop Wi-Fi. Download it below.
On the Main PC Mobile Scanner — Windows installer Receives the phones' scans and puts them on the right counter's bill. Install it once on the Main PC (and on other counters that receive scans) — see Download & install.
Available now · Free

BillMate Scanner for Android

Install it on every phone that will scan barcodes in your shop.

File
BillMatePOS-Scanner.apk
Version
1.0.0 · 11 October 2026
Size
28.5 MB
Android
Android 7.0 or newer
Permissions
Asks only for the camera (to read barcodes). Uses the shop Wi-Fi to reach the Main PC.
Check the file (SHA-256) 595183c945b030ef143e946e1f3c352e553dbeebc92f32f0edb6a9312be3713d
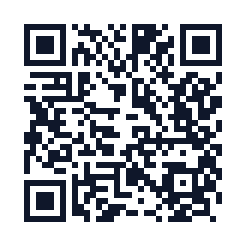
QR code: opens sastilab.com/billmatepos/#android-app on your phone

Scan with your phone

Open the phone's camera and point it at this code. This page opens on the phone — then tap Download Android App.

sastilab.com/billmatepos/#android-app

Already on your phone? Just tap the green button.

Step 1

Install the app on the phone

  1. Tap Download Android App. If Chrome says the file might be harmful, tap Download anyway.
  2. Open the downloaded file and tap Install.
  3. Asked to allow installing apps from this source? Tap Settings, turn on Allow from this source, go back and tap Install.
  4. If Google Play Protect shows a message, choose to install anyway. The app is not on Google Play yet — it comes directly from SastiLab.
  5. Open BillMate Scanner and allow the camera when asked.
Step 2

Connect the phone to BillMatePOS

First install the Mobile Scanner on the Main PC (Windows) and restart BillMatePOS there.

  1. Connect the phone to the shop's Wi-Fi — the same network as the Main PC.
  2. Open BillMate Scanner. It finds the Main PC by itself. If it does not, type the address shown at the end of the Windows setup, for example http://192.168.1.50:4001.
  3. Log in with the BillMatePOS user name and password of the cashier who works at the counter.
  4. Scan a product: it appears on the bill of the counter where that cashier is logged in.

New version of the app? Download it from this page again and install it over the old one — the app keeps its settings. Phones that had a test version of the app from SastiLab must uninstall it first. Need help? support@sastilab.com

Shop, counter, licence — explained

What is a “counter”?

A computer where bills are made. A shop can have 1, 2 or 3 counters. They share one database, so items, stock and bill numbers are the same on all of them.

Do I need a licence for the Main PC?

Yes. The Main PC is Counter 1, and each billing counter requires its own licence. A shop with 3 counters needs 3 licences: ₹8,997 per year.

Is the 30-day trial for each counter?

No — the trial is for the whole shop. It starts the first time BillMatePOS is used, and all counters share the same 30 days.

What happens when the trial or a licence ends?

New bills pause on that counter until it is activated or renewed. Nothing is deleted: your bills, items, stock and reports stay. After a licence (not the trial) ends, the counter can still bill for 14 more days.

I am adding a counter later in the year. What do I pay?

₹2,999 for a 12-month licence.

Does renewal need internet?

Only once: when the counter is online, BillMatePOS picks up the renewed licence by itself. Daily billing works without internet.

Can I move a licence to a new computer?

A licence belongs to one counter's computer. To move it, contact SastiLab.

Which Windows versions does BillMatePOS run on?

64-bit Windows: it is tested on Windows 7 SP1 and designed for Windows 10 and 11. 32-bit Windows is not supported.

Do I need the Mobile Scanner?

No. It is optional, for shops that want to scan barcodes with Android phones. USB and Bluetooth barcode scanners work without it. If you want it, install the Mobile Scanner on the Main PC and the free BillMate Scanner app on each phone.

How do I install a new version?

Back up on the Main PC, close BillMatePOS on every counter, then run the new installer on the Main PC first and on the counters after. Your data is kept — see Back up before you upgrade.

Ready to speed up your counter?

Tell us about your shop and we will show BillMatePOS working with your own items.